The Expense module allows users to record, manage, and track project-related or organizational expenditures efficiently.
It helps maintain financial transparency and provides a detailed breakdown of expenses across projects, departments, and programs.
How to Access
Log in to the application > go to the left menu > click on Expense > click on the Create Expense button.
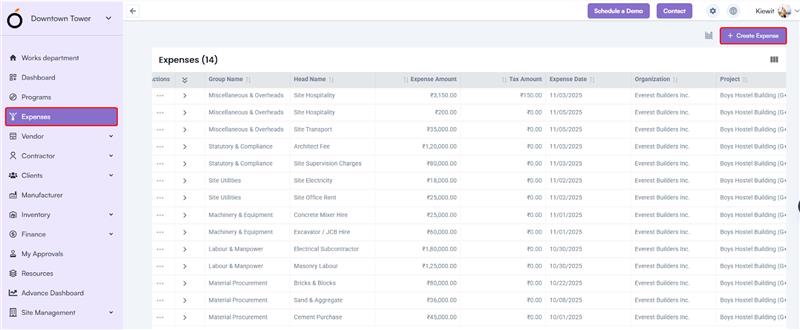
Steps to Create an Expense
- Select Organization Name – Choose the organization under which the expense is being recorded.
- Select Project – Pick the project related to the expense from the dropdown list.
- Select Expense Group – Choose the expense group (can be created in Company Settings > Finance Settings > Expense Group).
- Select Expense Head – Based on the selected group, the corresponding expense heads are displayed (can be configured in Company Settings > Finance Settings > Expense Head).
- Select Requested By* – Choose the employee who initiated the expense.
- Select Approver – Assign an approver (approvers can be configured in Company Settings > Organization > Approvers).
- Select Expense Date* – Specify the date of the expense.
- Select Currency* – Choose the currency for the transaction.
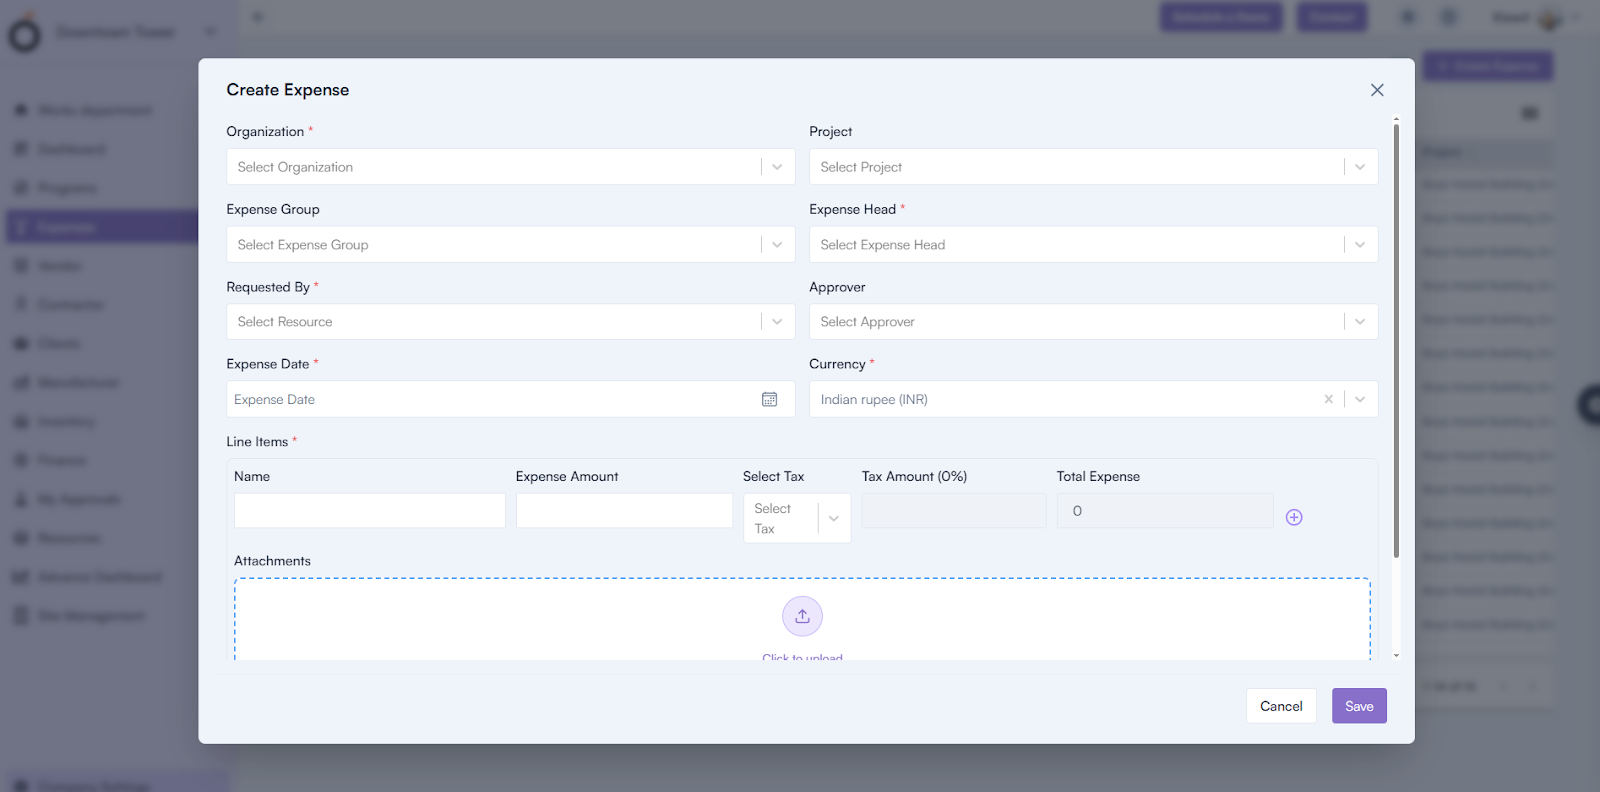
Line Items
Add individual expense line items:
- Name – Description or purpose of the expense.
- Expense Amount – Enter the amount for the line item.
- Select Tax – Choose the applicable tax rate.
Upon entering the above, the system automatically calculates:
- Tax Amount (0%)
- Total Expense
You can upload attachments such as bills, receipts, or vouchers.
The following fields are automatically filled:
- Net Amount*
- Tax Amount*
- Total Expense Amount*
You can also add multiple line items by clicking on the + icon.
Click Save to create the expense successfully.
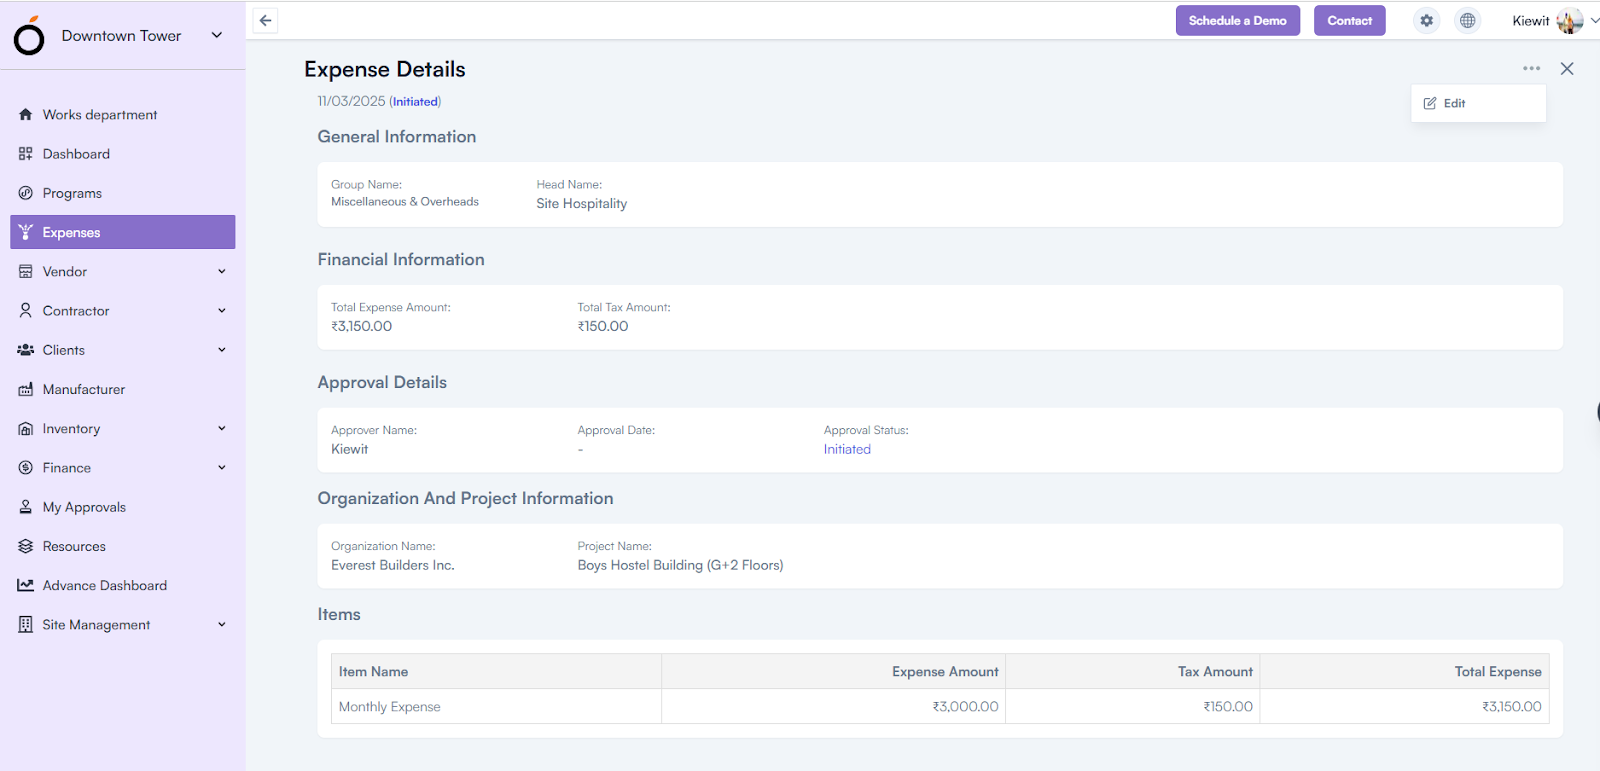
Expense Details Page
By clicking on the Expense Group Name, the system redirects to the Expense Details Page.
This page displays all information added during expense creation, organized under the following sections:
- General Information – Key expense and date details.
- Financial Information – Displays total, tax, and net amounts.
- Approval Details – Shows the approver and approval status.
- Organization and Project Information – Lists the associated organization and project.
- Items – Displays all expense line items with their amounts and taxes.
Dashboard View
Login to the application > go to the left menu > click on Expenses > go to the header section > click on the Dashboard View icon.
The Expense Dashboard provides a visual summary of expense data through interactive charts and graphs, offering insights such as:
- Monthly Expense Trend – Shows the spending pattern month-wise.
- Expense by Projects – Displays expense distribution across projects.
- Department-Wise Expenses – Compares expenses between different departments.
- Expenses by Programs – Highlights spending across ongoing programs.
- Expenses by Organization – Summarizes total expenses for each organization unit.
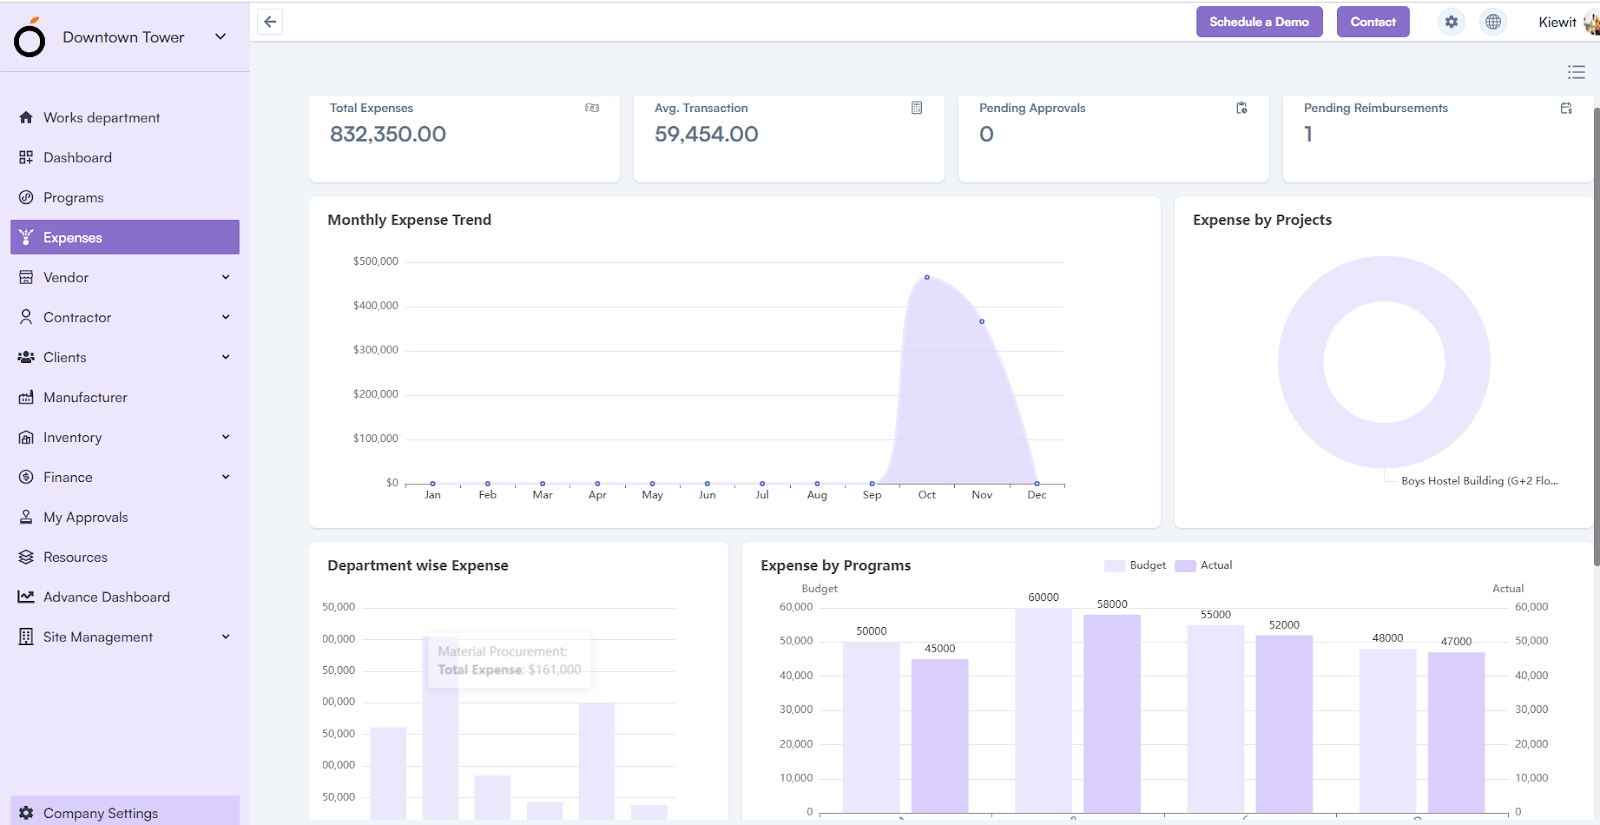
KPI’s
The Expense module dashboard also displays key performance indicators for quick insights:
- Total Expenses – Overall expenses recorded within the system.
- Average Transaction – Average amount spent per expense entry.
- Pending Approvals – Number of expenses awaiting approval.
Pending Reimbursements – Expenses submitted but not yet reimbursed.