Item Received

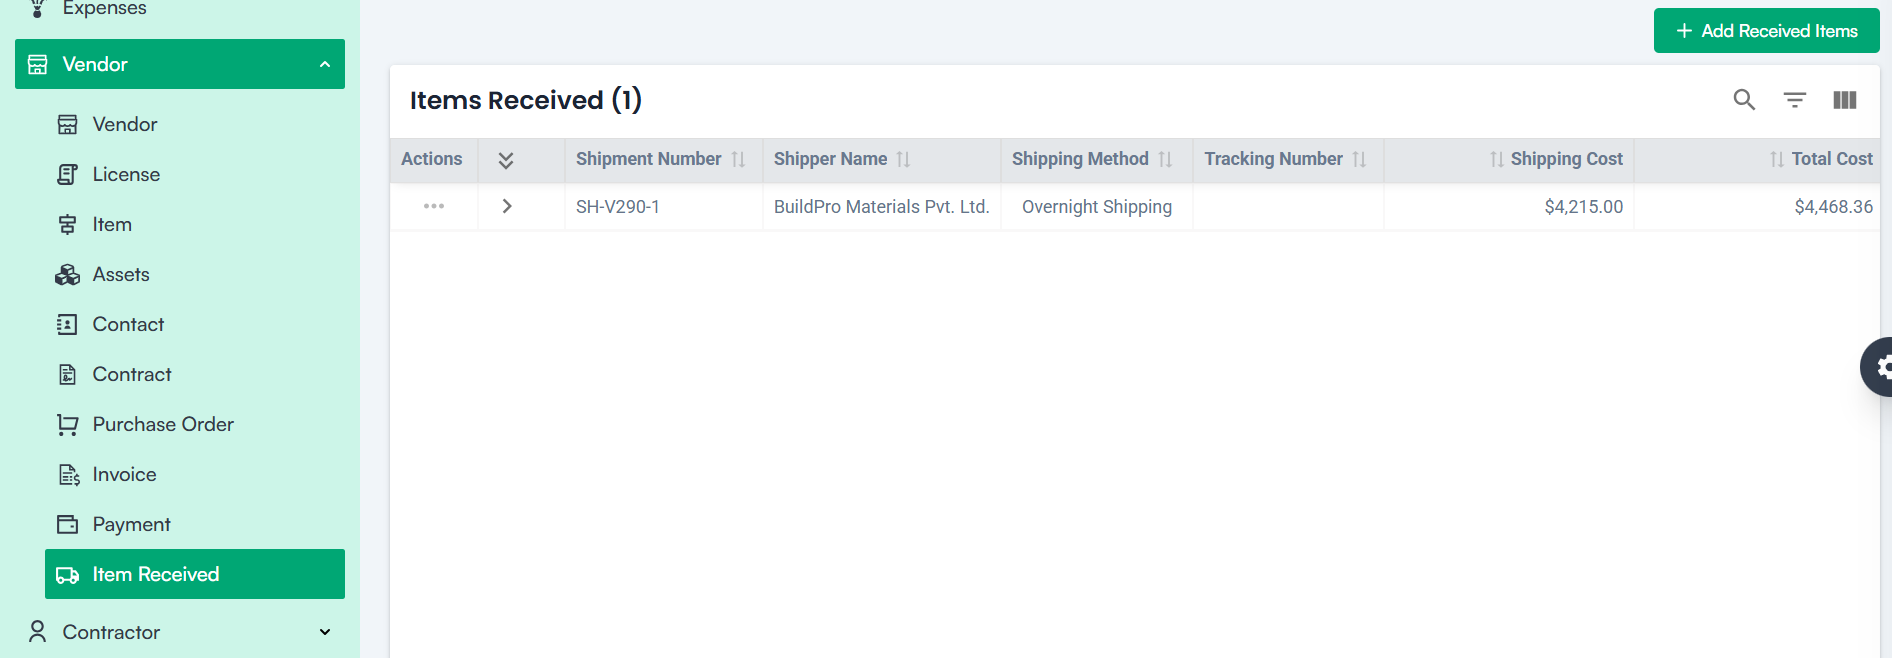
  • The Item Received section enables users to track and manage goods received from vendors.
  •  It ensures that all shipments are accurately recorded, monitored for delivery schedules, and reconciled with purchase orders and invoices. 

Navigation Path

  • Log in to the application.
  • Go to the left menu and click Vendor.
  • Click Item Received.
  • Click Add Received Items to open the form for recording received shipments.

Item Received

Create Shipment – Form Fields

1. Select Project

Choose the project associated with the shipment from the dropdown.

2. Select Vendor

Select the vendor linked to the project.

3. Select Purchase Order

  • Pick the purchase order corresponding to the shipment.
    • Upon selecting the purchase order, all items associated with it are automatically filled with their respective quantities and prices.

4. Select Invoice Number

  • Choose the invoice linked to the shipment.

5. Select Shipping Method

  • Specify the method used for transporting the items.

6. Enter Shipping Cost

  • Enter the shipping cost incurred.

7. Enter Total Cost

  • The total cost is automatically calculated based on the shipment details.

8. Expected Delivery Date

  • Select the date when the shipment is expected to be delivered.

9. Enter Tracking Number

  • Provide the tracking or transaction number for reference.

10. Enter Total Weight

  • Specify the total weight of the items received.

Enter Total Volume

  • Fill in the total volume or space occupied by the items.

Enter Reference Number

  • Provide a reference number for easy tracking.

Select Status

  • Choose the current status of the shipment from the available options:
    • Draft: Shipment is being prepared but not yet dispatched.
    • Dispatched: Shipment has been sent from the source location.
    • In Transit: Shipment is currently on the way to its destination.
    • Cancelled: Shipment has been called off and will not be delivered.
    • Received: Shipment has arrived and been confirmed at the destination.

Enter Transporter Name

  • Fill in the name of the transporter handling the shipment.

Enter Transporter Note

  • Add any additional notes or details about the transporter.

Upload Attachments

  • Attach relevant documents like delivery notes, invoices, or shipment confirmations by clicking “Click to upload”.

Enter Notes

  • Add any remarks or observations related to the shipment.

Action Buttons

1. Save

  • Click this to save the received shipment details and create the record.

2. Cancel

  • Click this to discard any entered data and exit the form without saving.

Note: For creating a Payment :

Mandatory Fields:

  • Vendor *
  • Purchase Order *
  • Invoice Number *
  • Shipping Method *
  • Expected Delivery Date *

Vendor Payment

  • The Vendor Payment module enables users to record payments made to vendors against specific invoices.
  •  It simplifies financial management, tracks payments, and helps with reporting through KPIs and analytics.

Navigation Path

  • Log in to the application.
  • Go to the left menu and click Vendor.
  • Click Payment.
  • Click Add Payment.

Vendor Payment

Create Payment

1. Select Project

  • Choose the project related to the payment.

2. Select Vendor

  • Choose the vendor to whom the payment is being made.

3. Select Invoice

  • Pick the invoice linked to the vendor.
  • After selecting the invoice, the following fields are automatically pre-filled:
    • Payment Due Date: Date when the payment is expected.
    • Invoice Amount: The original invoice amount before tax.
    • Tax Amount: Tax applied to the invoice.
    • Sub Total: The invoice amount excluding tax.
    • Total Tax Amount: The cumulative tax amount for the invoice.
    • Total Amount: The invoice amount including tax.
    • Payment Amount: The amount being paid.
    • Currency Code: The currency used for the payment.

4. Enter the Adjustment Amount (Optional)

  • If applicable, enter any adjustments to the payment.

5. Enter Payment Date

  • Specify the actual date the payment is made.

6. Enter Payment Method

  • Select how the payment was made (bank transfer, cheque, etc.).

7. Select Approver

  • Choose the person authorized to approve the payment.

Select Payment Made By

  • Specify who made the payment.

8. Enter Transaction Number

  • Provide the transaction or reference number for tracking.

9. Upload Attachments

  • Attach supporting documents such as receipts or confirmations.

10. Enter Reference Note

  • Add any additional remarks or notes about the payment.

11. Save Button

  • Click Save to create and record the payment.

Note: For creating a Payment :

Mandatory Fields:

  • Vendor *
  • Invoice *
  • Payment Date *
  • Approver *
  • Payment Made By *
  • Transaction Number *

Payment – Table Listing

Each payment record displays the following details:

1. Actions

  • View, Edit, Delete.

2. Payment Reference Number

  • Unique identifier for the payment record.

3. Payment Amount

  • The amount paid.

4. Project Name

  • Project associated with the payment.

5. Vendor Name

  • The vendor receives the payment.

6. Payment Method

  • How the payment was made.

7. Payment Date

  • The date of the payment.

8. Status

  • Current state of the payment.

Invoice KPI’s

The dashboard provides quick insights into payment activities:

1. Total Payments Made

  • The total number of payments processed.

2. Total Payment Amount

  • The cumulative value of payments made.

3. Pending Payments

  • Amounts awaiting clearance or approval.

4. Average Payment Amount

  • The average value of all recorded payments.

5. Payments By Type Vendor

  • Breakdown of payments grouped by vendor type.

Additional Features

  • Global Search – Easily search for payments by reference number or other criteria.
  • Sorting – Sort the payment list by date, amount, project, or status for better visibility.

Vendor Invoice

Overview

  • The Vendor Invoice section allows you to create, track, and manage invoices issued by vendors.
  • This ensures that payments, billing, and financial reconciliation are properly handled based on purchase orders and contract terms.

Navigation Path

  • Log in to the application.
  • Go to the left menu and click Vendor.
  • Click Invoice.
  • Click Add Invoice.

Vendor Invoice

Create Invoice – Form Fields

1. Select Project

  • Choose the project associated with this invoice.

2. Invoice Type

Select the type of invoice from the dropdown options:

  • Regular
  • Proforma
  • Credit

3. Enter Invoice Number

  • Provide a unique invoice reference number.

4. Select Invoice From

  • Select the vendor name from the dropdown list.

5. Select Purchase Order

  • Choose the related purchase order.

6. Select Invoice To

  • Select the organization name receiving the invoice.

7. Select Currency

  • Choose the currency for the invoice.

Based on the above inputs, the following fields are auto-filled:

  • Invoice Amount
  • Tax Amount
  • Total Amount

8. Select Payment Terms

  • Choose the payment terms predefined in the Company Settings ➝ Finance Settings.

9. Select Invoice Date

  • Choose the date the invoice was issued.

10. Select Due Date

  • Enter the date by which the payment is expected.

11. Select Invoice Receive Date

  • Record the date when the invoice was received.

12. Upload Attachments

  • Attach supporting documents like receipts, contracts, or delivery notes.

Note: For creating an Invoice:

Mandatory Fields:

  • Project *
  • Invoice Type *
  • Invoice Number *
  • Invoice From *
  • Purchase Order *
  • Invoice To *
  • Payment Terms *
  • Invoice Date *
  • Due Date *
  • Invoice Receive Date *

Invoice – Table Listing (Vertical Format)

Each invoice record displays the following fields:

1. Actions

  • View, Edit, Delete, and Make Payment options.

2. Invoice Number

  • Unique invoice identifier.

3. Vendor Name

  • The vendor issuing the invoice.

4. Project Name

  • The related project.

5. Invoice Amount

  • Amount before tax.

6. Tax Amount

  • Tax is applied to the invoice.

7. Total Amount

  • Final amount including tax.

8. Due Date

  • Payment deadline.

9. Status

  • Displays the current state of the invoice:
    • Draft / Submitted: Invoice created but not yet approved.
    • Paid / Settled: Invoice fully cleared and payment received.
    • Cancelled / Rejected: Invoice marked invalid or refused.
  • Additional Features:
    • Search: Locate invoices using invoice number or other available filters.
    • Sort: Arrange invoices by date, amount, or status for easier tracking.

Invoice KPI’s

1. Total Invoice

  • Displays the total number of invoices recorded.

2. Total Paid

  • Shows the cumulative value of invoices that have been settled.

3. Total Outstanding

  • Indicates unpaid invoice balances.

4. Overdue Invoice

  • Highlights invoices past their due date.

5. Unpaid Invoices

  • Lists pending payments awaiting processing.

6. DPO (Days Payable Outstanding)

  • Lists the Average days taken to pay suppliers

Vendor Purchase Order

  • The Vendor Purchase Order section allows users to create and manage purchase orders related to vendors.
  •  A purchase order formalizes procurement requests, ensuring that vendor-supplied materials, equipment, or services are properly tracked, priced, and aligned with approved contracts.

Navigation Path

  • Log in to the application.
  • Go to the left menu and click Vendor.
  • Click Purchase Order.
  • Click Add Purchase Order.

Vendor Purchase Order

Create Purchase Order – Form Fields

1. Select Project

  • Choose the project for which the purchase order is being created from the dropdown list.

2. Select Vendor

  • Choose the vendor from the dropdown list.

3. Select Contract

  • Select the approved contract from the dropdown. Only contracts in the Approved or Completed stage will appear here.

4. Purchase Date

  • Select the date of the purchase using the calendar picker.

5. Purchase Order Reference

  • Enter a unique reference number for tracking the purchase order.

6. Address Details

Enter the shipping or billing address as applicable:

  • Address Line 1
  • Address Line 2
  • Country
  • State
  • City
  • Zip Code

7. Attachments

  • Upload relevant documents such as quotations, agreements, or delivery notes.

8. Select Item

  • Choose an item from the vendor’s list. The unit price is auto-filled based on predefined rates.

9. Enter Quantity

  • Provide the quantity of the item required. The total price is automatically calculated.

10. Select Tax

  • Choose the applicable tax from the dropdown. The tax amount and total purchase amount are updated accordingly.

Total Purchase Amount Validation

  • The system ensures that the total amount does not exceed the approved contract amount.

Note: For creating a Purchase Order:

Mandatory Fields:

  • Project *
  • Vendor *
  • Contract *
  • Purchase Date *
  • Item Name *
  • Select Tax *

Purchase Order Workflow

  • Upon creation, the purchase order status is set to Draft.
  • Once reviewed and approved, the status updates automatically to Approved or other applicable stages.
  • The purchase order then progresses toward invoicing once the goods or services are delivered.

Each purchase order record displays the following information:

1. Actions

  • View, Edit, and Delete options.

2. PO Number

  • Unique identifier for the purchase order.

3. Vendor Name

  • Name of the vendor supplying the goods or services

4. Project Name

  • The project is associated with the purchase order.

5. Subtotal

  • The amount before tax.

6. Tax Amount

  • The applicable tax for the purchase.

7. Total Amount

  • The total cost, including tax.

8. PO Date

  • The date when the purchase order was created.

9. PO Reference

  • Reference number for tracking.

10. Payment Type

  • Specifies the type of payment method.

11. Payment Method

  • The method through which payment will be made.

12. Status

  • The current status (Draft, Under Review, Reviewed, Issued, Delivered, Pending Inspection, Cancelled, Completed, Closed, Sent, Approved, etc.) of the purchase order.

Available Actions:

  • View – See detailed purchase order information.
  • Edit – Update purchase order details.
  • Delete – Remove the purchase order after confirmation.

Additional Features:

  • Search – Search purchase orders by PO number or other criteria.
  • Sorting – Click column headers to sort by date, amount, or other attributes.

Purchase Order KPI’s

  • Total POs – Total number of purchase orders created.
  • Total PO Value – The sum of all purchase orders’ amounts.
  • Total Approved PO Value – The value of all purchase orders that have been approved.
  • Total Paid Against POs – The total amount that has been paid against purchase orders.
  • Outstanding PO Payables – The amount pending payment for purchase orders.
  • Open PO Value – The total value of purchase orders that are still open or in process.

Next Steps After Purchase Order Completion

Once the purchase order is created and confirmed, it flows into the Invoice section where billing can be processed and payments initiated.

Vendor Contract

Overview

  • The Vendor Contract section is designed to register, manage, and track contractual agreements between your organization and vendors.
  • The form captures essential details such as contract duration, payment terms, deliverables, legal clauses, and approval workflows to ensure transparency, accountability, and compliance throughout the vendor relationship.

Navigation Path

  • Log in to the application.
  • Go to the left menu and click Vendor.
  • Click on Contract.
  • Click the Add Contract button.

Vendor Contract

Form Field Details

Create a Contract – Steps

1. Select Project Name

  • Choose the project associated with this contract from the dropdown list.

2. Select Vendor Name

  • Select the vendor from the “Party” dropdown.

3. Select Contact

  • Choose the appropriate contact associated with the selected vendor.

4. Contract Name

  • Enter the name of the contract.

5. Contract Type

  • Select the type of contract from the dropdown.

6. Contract Status

  • By default, the status is set to Draft.

7. Date Range

  • Select the start date and due date using the calendar picker.

8. Currency Code

  • Select the currency in which the contract value will be defined.

9. Tax Selection

  • Select applicable taxes from the dropdown. Taxes are configured in Company Settings ➝ Finance Settings ➝ Tax. Newly added taxes are available here.

10. Payment Terms

  • Select payment terms from the dropdown. These are configured in Company Settings ➝ Finance Settings ➝ Payment Terms.

11. Contract Value

  • Enter the total contract value.

12. Tax Amount & Total Contract Amount

  • The tax amount (default 0%) and total contract amount are automatically calculated based on the entered price.

13. Select Approver

  • Choose the approver from the dropdown. Approvers are configured in Company Settings ➝ Organisation Settings.

14. Contract Execution Date & Review Date

  • Enter the date of contract execution and the review date.

Contract Deliverables

Define the expected deliverables with the following fields:

  • Deliverable Name
  • Deliverable Date
  • Additional Notes
  • Deliverable Description

Contract Terms

Enter specific terms by filling in:

  • Term Name
  • Term Number
  • Term Type (select from Payment, Delivery, Penalty, or Add Deliverable)
  • Date
  • Amount
  • Currency
  • Term Description

Jurisdiction Name & Legal Clauses

Specify the jurisdiction and add any legal clauses that are part of the agreement.

Parameter Selection & Attachment Upload

Select relevant parameters and upload any supporting documents.

Action Buttons

  • Save – Saves the contract record.
  • Cancel – Discards the entered data and exits the form.

Note: For creating a Vendor Contract

 Mandatory Fields:

  • Project *
  • Party *
  • Contact *
  • Contract Name *
  • Contract Type *
  • Currency *
  • Tax *
  • Payment Terms *
  • Contract Value *
  • Approver *

Actions available per record:

  • View – See contract details.
  • Edit – Update contract information.
  • Contract Template – Access template options.
  • Delete – Remove the contract.

Additional Features:

  • The contract status determines eligibility for generating purchase orders.
  • Clicking the contract name redirects to the contract details page with full information.

Contract Details Page – Additional Options

When viewing the contract details, you can:

  • Print Preview – Print or preview the contract layout.
  • Add Signature – Include digital signatures.
  • Terminate – End the contract early.
  • Add Appendix – Append supporting documents or details.
  • Add Amendment – Create contract amendments as needed.
  • Audit Log – Track changes and history for accountability.

Contract KPI’s

  • Total Contracts – Displays the total number of contracts.
  • Total Contract Value – The cumulative value of all contracts.
  • Outstanding Amount – Tracks unpaid or pending amounts.
  • Pending Contracts – Shows contracts awaiting approval or action.
  • Active Contracts – Lists all ongoing contracts.
  • Expired Contracts – Tracks contracts that have passed their end date.

Vendor Contact

Overview

The Vendor Contact section allows your organization to maintain detailed contact information for each vendor.Contacts can be used for direct communication related to billing, shipping, or purchases.

Navigation Path

  • Log in to the application.
  • Navigate to the left menu and click Vendor.
  • Select Contact.
  • Click Add Contact.

Vendor Contact

Field Descriptions

1. Select Vendor

  • Choose the vendor to whom the contact belongs from the dropdown. Only registered vendors are available in the list.

2. First Name

  • Enter the first name of the contact person.

3. Last Name

  • Enter the last name of the contact person.

4. Contact Type

Select the purpose of the contact from the dropdown options, such as:

  • Billing
  • Shipping
  • Purchase

5. Designation

  • Enter the job title or designation of the contact, such as “Procurement Manager” or “Accounts Officer.”

6. Email

  • Provide the official email address for communication.

7. Phone Number

  • Enter the contact’s mobile or landline number. Supports international format selection.

8. Address Line 1 & Line 2

  • Enter the physical address if available, such as the office location or site address.

9. Country / State / City / Zip Code

  • Provide detailed geographical information to ensure proper recordkeeping and traceability.

Action Buttons

  • Save – Saves the contact record under the selected vendor’s profile.
  • Cancel – Discards any entered data and closes the form without saving.

Note: For creating a Vendor Contact:

Mandatory Fields:

  •  Vendor Name *
  • First Name *
  • Last Name*
  • Designation *
  • Email *

Direct Communication

Contacts listed here can be used to initiate emails, calls, or correspondence directly from the vendor’s profile.

Billing and Shipping Coordination

Separate contacts for billing and shipping ensure that inquiries and logistics are directed to the right person.

Category: Construction Academy

Subcategory: Budgeting and Planning

Subcategory: Construction Phase

Subcategory: Design Coordination

Subcategory: Estimation Techniques

Subcategory: Initiation and Feasibility

Subcategory: Introduction

Subcategory: Personal Management

Subcategory: Project Close-Out

Subcategory: Project Scheduling

Subcategory: Project Teams

Subcategory: Proposal Management

Subcategory: Total Quality Management

Subcategory: Tracking and Control

Subcategory: Work Breakdown

Category: Help Desk

Subcategory: Client

Subcategory: Construction 101

Subcategory: Contractor Management

Subcategory: Expense

Subcategory: Finance Budget

Subcategory: Inventory Management

Subcategory: My Approvals

Subcategory: Site Management

Subcategory: Vendor Management